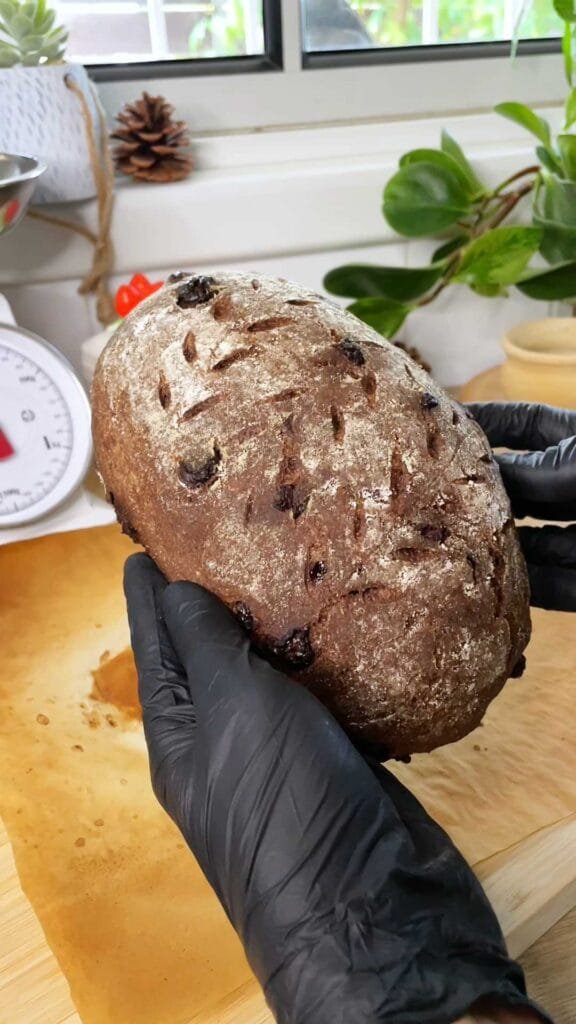
Gluten Free Chocolate and Cranberries Bread
This recipe for Gluten Free Chocolate and Cranberries Bread was inspired by my recent discovery of brown teff flour- it has a very mild aromatic profile, compared to its sibling- the white teff flour. It has a fruity flavor that reminds of chocolate, with a very super fine sweet tone.
This bread was shaped into a loaf without the help of a proofing basket, and you don’t even need a pan to bake it. However, using a pizza stone is most welcome.
The smell of chocolate will be absolutely fabulous, and this break comes out beautifully delicious – I hope you give it a try.
The preparation method includes mixing a preferment the night before. It takes just a couple of minutes- all of the instructions are listed below.
I’m also adding a few key points that should be considered when making this bread:
- Ensure that you’re using super finely milled flours (whether they are storebought or whether you mill them at home).
- In all my gluten free bread recipes I’m calling for ground whole psyllium husk. If opting to use psyllium husk powder (which is a lot finer and white in color), you should use only 84% the amount of psyllium called for in the recipe, as it tends to be more absorbent.
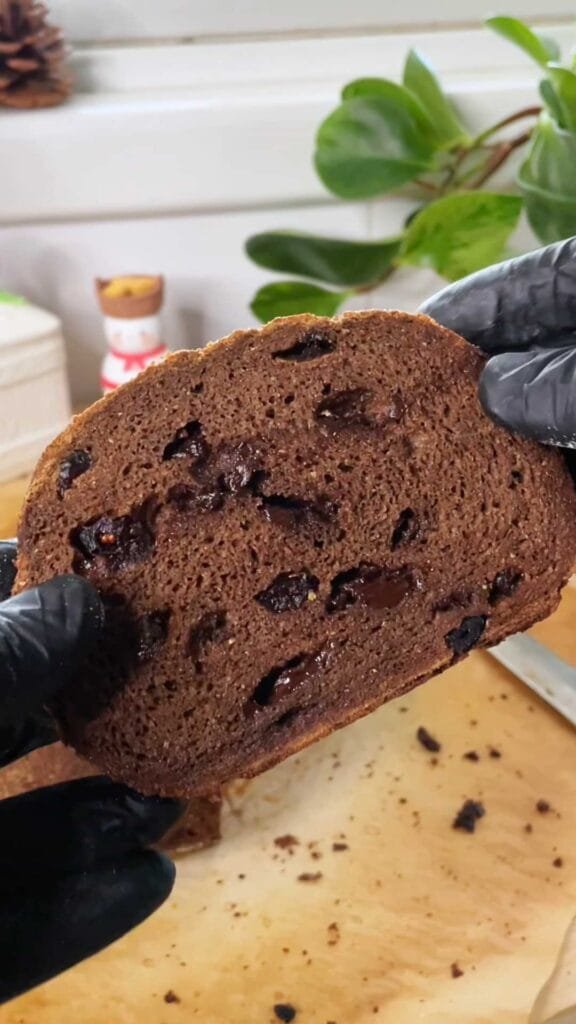
- It is important not to slice into the bread before it cools down completely. It is highly recommended to wait between 4-5 hours after baking. Otherwise, it tends to have a gummy texture.
First published:
Last modified:
Gluten Free Chocolate and Cranberries Bread:
Equipment: No special equipment is needed.
Recipe: A single loaf
Flour mixture (360g):
| Ingredient | Amount (g) |
| Sorghum Flour | 100g |
| Brown Teff Flour | 145g |
| Tapioca Flour | 65g |
| Potato Starch | 50g |
Preferment:
| Ingredient | Amount (g) |
| Flour Mixture | 108g |
| Water | 70g |
| Dry Yeasts | 1/16 tsp |
The Dough:
| Ingredient | Amount (g) |
| Flour Mixture | 252g |
| Preferment | 178g (The whole amount) |
| Psyllium Husk | 25g |
| Dry Yeasts | 9g |
| Salt | 9g |
| Dutch Processed Cocoa Powder | 15g |
| Cinnamon | 1.5 tsps |
| Water | 123g |
| Milk | 193g |
| Honey | 36g |
| Olive Oil | 10g |
| Dark Chocolate Chips (55%) | 90g |
| Dried Cranberries | 55g |
Preparation:
For the preferment (advanced preparation, the night before):
- Thoroughly mix all flours together to combine. Weigh out 108g into a separate bowl.
- Into the separate bowl add 1/16th tsp of yeasts and mix them to combine.
- Add in the 70g of water and mix thoroughly- you should get a pretty stiff dough. Cover the bowl with plastic wrap and let it ferment at room temperature between 8-12 hours.
- The bowl with the rest of the flour mixture should be covered with plastic wrap and stored in the refrigerator until use.
For the dough:
You could knead the dough using the machine or manually, however you prefer. I’ll describe both methods:
Machine mixing:
- Mix the psyllium husks with the honey, 123g of water and 193g of milk. Set it to the side for a few minutes until a gel forms.
- Into the bowl of a standing mixer, fitted with the paddle attachment, mix the rest of the flour mixture, yeasts, cocoa powder, cinnamon and salt.
- Add in the preferment, oil, and psyllium gel.
- Mix on the lowest speed for 3 minutes. Note to stop the machine every minute and using a rubber spatula, scrape the paddle attachment, sides and bottom of the bowl to promote even mixing. Towards the end of the mixing time, add in the chocolate chips and cranberries. Mix for a couple of seconds just to get them combined into the dough. The final dough should not be sticky to the touch at all, with clean hands.
Manual mixing:
Follow steps 1-3 above. The mixture can be mixed using a wooden spoon, but at some point, it will be inefficient. At this stage you should get in with your hands (please do not wear gloves for this task). Squeeze the dough between your fingers, and make sure there are no lumps of unmixed psyllium or flour visible. Occasionally, you could use a bench scraper or a rubber spatula to scrape off any dough sticking to your hand, to combine it with the rest of the dough in the bowl.
The final dough should not be sticky to the touch at all, with clean hands.
Note that the dough is immediately workable, and you shouldn’t wait or proof it after it is done kneading.
Assembly and baking:
- Transfer the dough onto a lightly floured counter, and dust it as well with some gluten free flour blend (anything you have at home).
- Roll the dough to a rectangle sized 35cm (l) x 20cm (w). Make a letter fold, and roll the dough from bottom to top to a log. Seam the edges together with your fingers (see video demonstration).
- Shape the log to a loaf sized 20cm (l) x 9.5cm (w) x 7.5cm (h), and place it on a tray lined with parchment paper.
- Moisturize the loaf with some water, and cover it tightly with plastic wrap.
- Transfer the dough to the refrigerator, to proof for 75 minutes (1h + 15 minutes).
- Meanwhile, preheat your oven to 190C, fan mode off, placing a baking rack at the lowest shelf inside the oven.
- If you own a pizza stone, allow it to preheat along with your oven. In case you don’t, you could use a heavy-duty baking sheet instead.
- Take the dough out of the refrigerator, peel off the plastic wrap- you may dust the top with some flour and score the bread, or leave it as it is (not recommended, otherwise it explodes at random spots).
- Baking is done in two steps:
- Step 1 in which the bread is covered – I’m using a very large and tall baking pan to cover the bread. Transfer the bread into the oven, and bake it, covered, for 20 minutes.
- Step 2- take off the cover, and continue baking for 60 additional minutes (you may loosely cover it with aluminum foil after 30 minutes of baking, if you see it browns too quickly).
- Once done baking, transfer the bread out of the oven and place it directly on a cooling rack to let it cool down fully. It can take between 4-5 hours.
After the bread has cooled down, you can easily slice it to 1cm thick slices, store inside a zip-lock bag, and inside an airtight container. If packaging is done well, the bread stays good for 2-3 days at room temperature, but will store at best frozen; take out a few slices and re-heat in the microwave, about 10 seconds on each side, to restore the soft texture.