Vegan Sweet Potatoes and Onions Cheese Quiche
As Shavuot is approaching, I’ve met with the amazing Shahar Kichler (Vivida), and together we’ve made this vegan sweet potatoes and onions cheese quiche.
There’s some prejudice around vegan food, that it’s not delicious or trying to mimic something that its not… However, as someone who’s not vegan, it is important to understand that the ingredients you choose are *critical* to a successful final result.
Not all vegan substitutes are good and delicious, especially concerning vegan cheese. However, once you find a worthy substitute, that’s both of high quality and delicious, it is my promise to you that vegan baking will be super tasty and without any compromises.
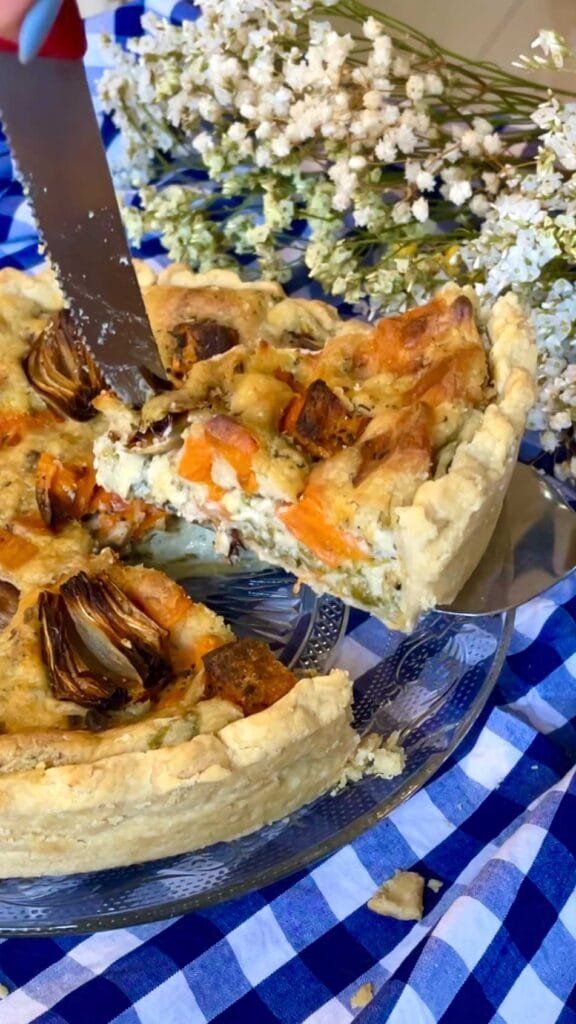
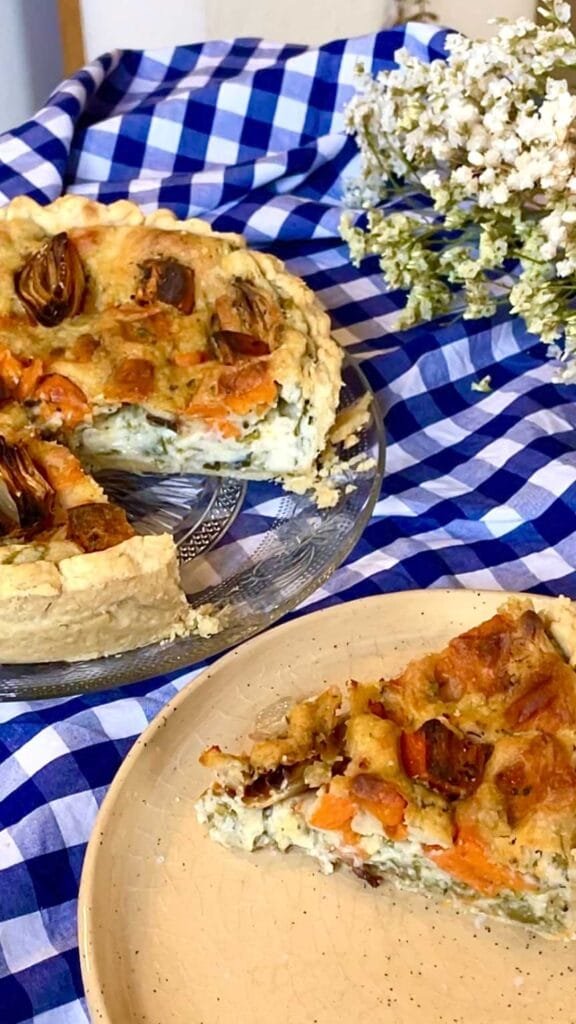
And indeed, we had an amazing result- the filling is cheesy and rich, combined baked sweet potatoes and shallots, baby spinach and basil.
For the crust, we’ve used a very flaky vegan pie crust, which is based on coconut oil.
I’ve pointed out some important throughout the recipe, and I recommend reading them thoroughly to get the perfect results.
First published:
Last modified:
Vegan Sweet Potatoes and Onions Cheese Quiche:
Equipment: A single round pie pan (one part), 20cm (d) x 3.5 (depth)
Recipe: a single quiche
For the dough (total 390g):
| Ingredient | Amount (g / units) |
| All-Purpose Flour | 220g |
| Coconut Oil (Softened consistency) * | 125g |
| Ice Water ** | 55g |
| Salt | 1/3 to 1/2 tsp |
* Coconut oil has 3 states of matter: liquid, when its temperature exceeds 23C. Softened, when its temperature is between 20-22C. And a solid state, when it is stored in a very cold environment. For this recipe, we need out coconut oil to be softened, which sort of reminds the texture of softened butter. If your coconut oil is not at this state, it needs to be heated for a few seconds in the microwave, or refrigerated for about 3 minutes, and in any case, it needs to be mixed in between until you get the texture right. This softened texture is the only one which will be able to successfully assimilate into the flour, and give that flaky effect similar to puff pastry dough. The coconut flavor is not distinguishable, however, it you’re still not a fan, you could use deodorized coconut oil, or substitute it for 160g of vegan butter).
** Ice water is simply cold water that are kept in the freezer for a few minutes, so they are just starting to crystallize and freeze. Even if some ice is generated during this process, it’s ok, and it should be added with the rest of the ingredients.
Baked Vegetables:
| Ingredient | Amount (g / units) |
| Sweet Potatoes | 2 Sweet Potatoes, peeled and cut to 1.5cm cubes |
| Shallots | 4 halved shallots |
| Salt | To taste |
| Herb De Provence * | To taste |
| Olive Oil | About 1.5 tbsps |
* Herb de Provence is a pre-made dried spice mixture which can be purchased. If you don’t have access to it, you can add some dried rosemary, oregano, basil and thyme.
Cheese Filling:
| Ingredient | Amount (g / units) |
| Vegan Cream Cheese * | 320g |
| Olive Oil | 25g |
| All Purpose Flour | 40g |
| Tepid Water | 160g |
| Salt | 1/3 tsp |
| Baby Spinach Leaves, washed and roughly chopped | 1/3 package |
| Fresh Basil Leaves, washed and roughly chopped | A fistful |
* Make sure to use the highest quality and top flavor vegan cream cheese you can source locally, as it will be the make or break of this recipe.
Preparation instructions:
For the baked vegetables:
- In a small roasting pan, mix together the cubed sweet potatoes, shallots, salt, Provence and olive oil.
- Bake in a pre-heated oven set to 180C, convection mode on, placing the baking rack at the center of the oven, for 30 minutes, until the veggies soften. Meanwhile, prepare the dough.
For the Dough:
- Into a food processor, add the flour and salt, and pulse to combine. Add the coconut oil and pulse just until the mixture looks like fine crumbs (small peas).
- Add in the water, and pulse just until the dough comes together when pinched between the fingers – this step is critical and it’s important to feel the dough and determine whether it feels a bit dry (if so, add between 1/2 to 1 tsp of cold water). Do not reach a dough ball stage when processing the dough with the machine.
- Transfer the dough onto a large piece of plastic wrap and use it to bring the dough together, which using the root of your palm. This is helping to minimize heat transfer from your hands to the dough.
- Wrap the dough with plastic wrap, and let it rest in the refrigerator for 15-20 minutes.
- On a lightly floured counter, roll the dough to a round circle that is 3mm thick. During rolling, you may dust your counter if you feel the dough sticks to it.
- Arrange the dough inside the pan. Note that there’s no need to flour or grease the pan- the dough contains sufficient amount of fat which prevents it from sticking to the pan after baking. Using scissors, trim the edges and leave only about 1cm of dough extending outwards.
- The edges should be folded into the gap between the pie pan and the dough, and pinched together all throughout the perimeter of the pan. This is also the stage to crimp the border of your crust if desired.
- Dock the bottom with a fork and transfer the pan with the dough to the freezer for at least 20 minutes, while making the filling.
For the Cheese Filling:
- Into a large bowl add all of the filling’s ingredients: cream cheese, olive oil, flour, water and salt. Using an immersion blender, process everything to a smooth and somewhat thick batter. You may also use a food processor for this step.
- Fold in the baby spinach and basil leaves set to the side.
Baking:
- Preheat the oven to 200C, convection mode on, placing the baking rack at the lowest level inside the oven.
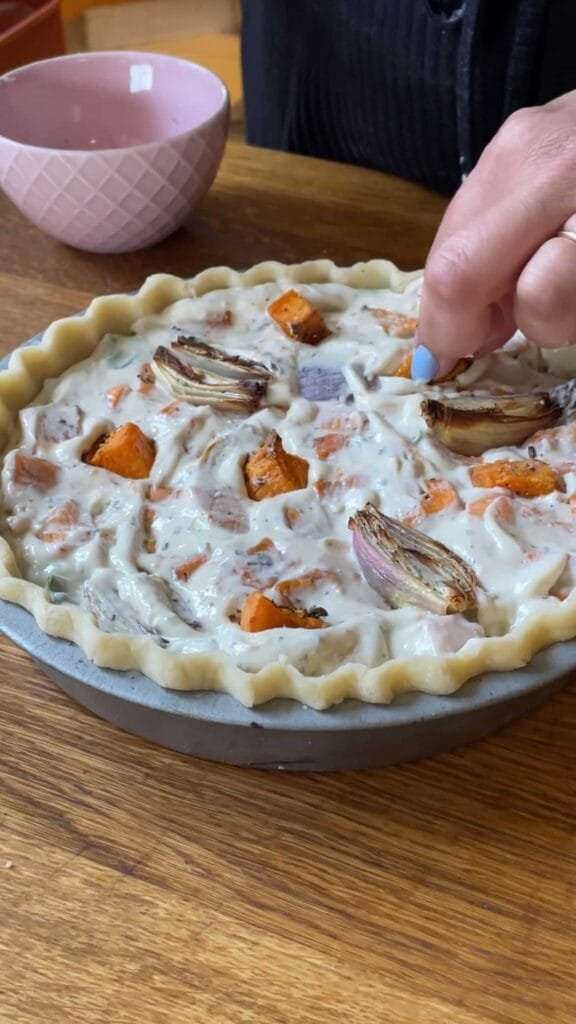
- Take the crust out of the freezer, and fill it with the cheese filling.
- Stud the filling with the reserved baked vegetables.
- Bake at two stages: first, bake at 200C, convection mode on, for 20 minutes. Then, lower the temperature to 175C (convection mode on), and continue baking for additional 35 minutes. The crust will lightly brown, the filling will puff up, set and be lightly golden brown.
- Take the pan out onto a cooling rack, and allow the quiche to cool down completely (!) before unmolding and cutting into it. It could take anywhere between 1.5-3 hours, depending on your room temperature. It’s also possible to put the quiche inside the freezer once the pan feels a bit warm to the touch, to promote the solidifying of the fats. In order to unmold the quiche, place a flat plate on top of it and invert it. If everything was done correctly, your quiche should release from the pan without any problems.
The quiche is at its best the day it is made, and needs to be stored refrigerated for up to 4 days.