Gluten Free Cheesey Garlic Bread
| You’re going to love this Gluten Free Cheesey Garlic Bread which turned out so soft and comforting. I just adore garlic bread, but there’s no way around it – fresh will always taste better. This recipe is super easy and simple, but my only caveat is to not go overboard with the amount of filling, and to make sure it is sealed well inside the dough so it doesn’t leak out during baking. This recipe can also be made vegan, and I’m writing down possible substitutes, and if you carefully follow the instructions, I’m sure it’s going to turn out amazing! |
First published:
Last modified:
Gluten Free Cheesey Garlic Bread:
Equipment: A single loaf pan sized: 25cm (l) x 7.5cm (h) x 10cm (w), lined with parchment paper
Recipe: 8 servings
Flour mixture:
| Ingredient | Amount (g) |
| Brown Rice Flour | |
| Buckwheat Flour | |
| Maize Flour | |
| White Rice Flour | |
| Tapioca Starch |
The Dough:
| Ingredient | Amount (g) |
| Flour Mixture | 375g |
| Whole Psyllium Husks | 26g |
| Water | 385g |
| Salt | 11g |
| Olive Oil | 25g |
| Silan | 25g |
| Garlic Powder | 2 tsps |
| Dried Basil | 1/2 tsp |
| Dry Yeasts | 10g |
| Shredded Mozzarella Cheese (Or vegan mozzarella) | 80g |
For brushing (mix everything together and brush after baking):
| Ingredient | Amount (g) |
| Milk (or Soy Milk) | 35g |
| Silan | 1/4 tsp |
For the Garlic Glaze:
| Ingredient | Amount (g) |
| Olive Oil | 10g |
| Unsalted Butter (Softened), or Vegan Butter | 20g |
| Mashed Garlic | 20g |
| Dried Basil | 1/3 tsp (or to taste) |
| Salt | 1/4 tsp (or to taste) |
Preparation:
- In a medium sized bowl, thoroughly mix the psyllium husks with the water and silan. Set it to the side until it forms a gel, about 15-20 minutes.
- Into a standing mixer bowl, fitted with the paddle attachment, mix the rest of the dough’s ingredients: flour mixture, salt, garlic powder, dried basil and dry yeasts.
- Add in the psyllium gel and the oil, and mix on low to medium speed for 4 minutes. Occasionally stop the machine to use a rubber spatula, and scrape the dough from the sides of the bowl and paddle attachment.
- Refrigerate the dough for 15-20 minutes of rest.
- Transfer the dough to a lightly floured counter. Dust the dough and divide it to 8 pieces of equal weight, about 107g each.
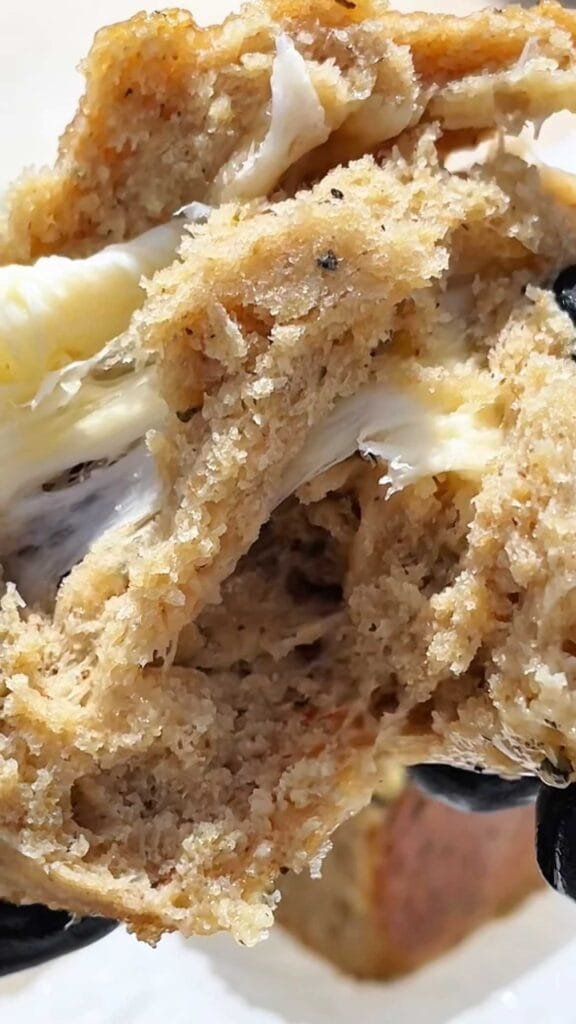
- On a lightly floured counter, using your palm, open each piece to a round disc, and place 10g of cheese at its center. Seal the cheese well with the dough, making sure you are pinching it with your fingers. Shape each piece to a smooth round ball. You may use a bench scraper for this task.
- Arrange the filled dough balls inside the prepared pan, add moisture with water spray bottle, and attach a large piece of plastic wrap directly on top of the dough.
- Proof in the refrigerator for 50-60 minutes. The bread should rise and almost reach the top of the pan.
- Preheat the oven to 200C, fan mode off, placing the baking rack at the lowest shelf inside the oven.
- Brush the bread with the brushing liquid, add more moisture using a water spray bottle, and bake for 25 minutes.
- As soon as the bread comes out of the oven, unmold it immediately from the pan and the attached parchment paper, placing it directly on top of a cooling rack.
- Brush the bread with the garlic glaze on top and all sides.
- Let the bread cool down for 25-30 minutes before serving. It will soften significantly, and will be at it’s best. It is highly recommended to consume this bread while fresh, the same day. However, it can be stored in a ziplock bag at a nice room temperature, and consumed within 2-3 days.