Gluten Free Jelly Donuts
They’re finally here!!! Gluten Free Jelly Donuts!!!
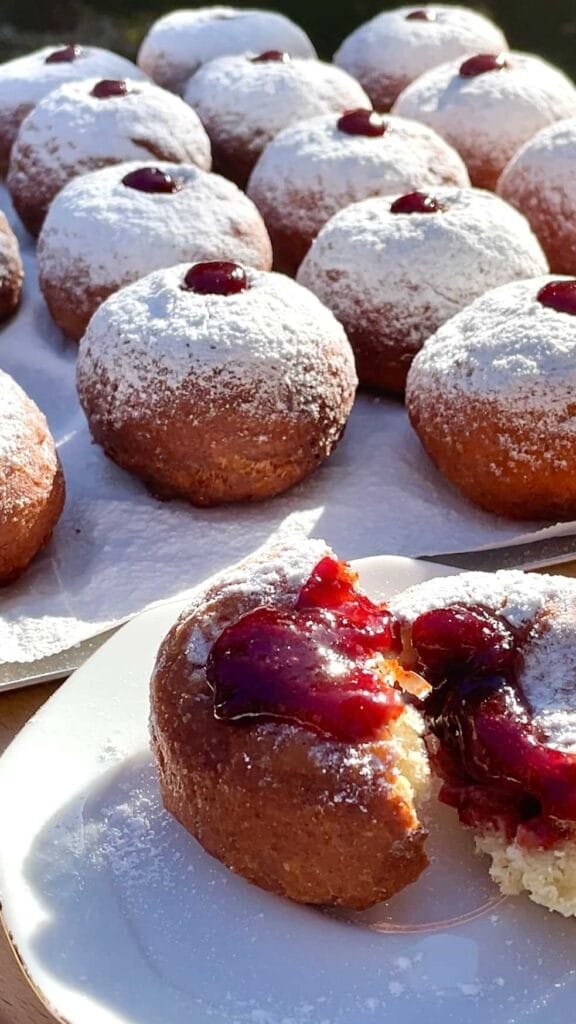
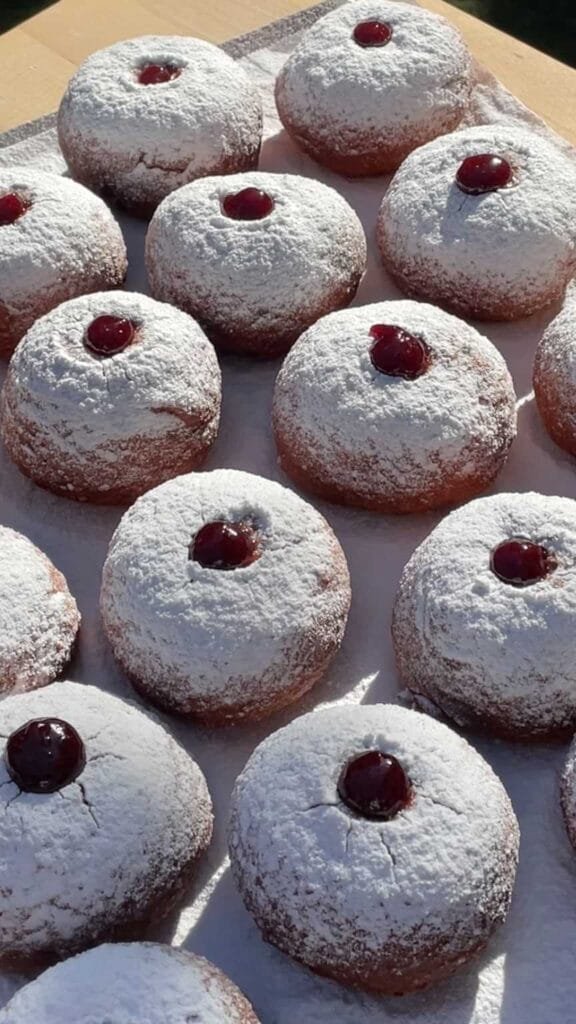
Soft, fluffy, filled with jam or any other filling of your choice. They turned out so good, and on my very first attempt at frying anything – this is not taken for granted, let me tell you.
Despite the fact that these donuts were fried, they weren’t greasy – inside or outside, and it felt like some sort of self-acknowledgement that I successfully worked with great accuracy (to my pleasant surprise!).
So, although I’ve not yet mastered frying techniques, all the tips and tricks food bloggers commonly share on their recipes are indeed important:
- It’s important to allow sufficient proving time so the donuts are airy and not too dense. I’ve added the exact dimensions of the dough in the recipe below.
- Temperature must be monitored at all times, and maintained between 160-165C. At lower temperatures, the donuts will absorb a lot of oil. At higher temperatures, the donut’s exterior will be cooked quicker than the inner parts, which will make it raw and dense (and also might get burnt). There’s a fine balance that you should be keeping your eyes on; however, there’s also some margin of error that is tolerable within that balance.
The pretty white stripe typical to fried donuts is unfortunately absent here, and as far as I know, this is also related to the lack of gluten in the dough. This, however, doesn’t impact one bit on the final outcome, and the flavor and texture are what really important.
To conclude, I’m very glad I could share this recipe for gluten free donuts that are fried, as I was getting many requests last year and it made me quite upset that I wasn’t able to do so.
So, I hope you’ll make and enjoy my recipe, and you’re more than welcome to raise questions and share your results with me.
First published:
Last modified:
Gluten Free Jelly Donuts:
Equipment:
- Deep frying pan or pot (I’ve used a pot sized 18cm [d] x 10cm deep.
- Food Thermometer
Recipe for 18 Gluten Free Jelly Donuts:
Notes:
- Feel free to halve this recipe if this is your first time trying out this recipe, or if you do not have previous experience working with individual gluten free flours.
- I’ve included suggestions for vegan substitutes based on my personal experience and knowledge, but do consider that I did not test a vegan version of this recipe.
Flour mixture:
| Ingredient | Amount (g) |
| Tapioca Starch | 350g |
| Sorghum Flour | 50g |
| Millet Flour | 140g |
| Oat Flour * | 160g |
* If you’re sensitive to oats, you may substitute the oat flour for:
70g Brown Rice Flour
30g Millet Flour
60g Sorghum Flour
The final flavor and texture are expected to be slightly different compared to the original recipe.
For the Psyllium Gel:
| Ingredient | Amount (g) |
| Whole Psyllium Husks | 36g |
| Full Fat Milk (3%) ** | 580g |
| Eggs ** | 100g (2 Medium Sized Eggs) |
** For Vegan variation:
Substitute milk and eggs with 650g of plant-based milk (Soy milk is preferable)
The Dough:
| Ingredient | Amount (g) |
| Flour Mixture | Entire Amount |
| Psyllium Gel | Entire Amount |
| Xanthan Gum | 14g |
| Baking Powder | 16g |
| Dark Rum (or any other liquor of your choice) – optional | 10g (can add up to 20g, may taste slightly bitter depending on the amount and type of liquor used) |
| Salt | 12g |
| Softened Butter ** | 80g |
| Dry Yeasts | 18g |
| White Granulated Sugar | 100g |
| Vanilla Sugar | 10g |
| Lemon or Orange Zest (do not skip) | Zest of 1 whole Lemon or Orange |
** For Vegan variation:
Substitute the softened butter with 110g or vegan softened butter, or 85g neutral tasting vegetable oil (that’s not coconut oil)
For Frying, Filling and Decorating:
| Ingredient | Amount (g) |
| Canola Oil | 1 Liter (may change depending on the size of pot you are using) |
| Jam of your choice | 300g |
| Powdered Sugar | QS |
Preparation instructions:
For the Dough:
- Prepare the psyllium gel: Into a medium sized bowl, add the psyllium, milk and eggs, and thoroughly mix them together. Set to the side until a gel forms, at least 20 minutes.
- Into a standing mixer bowl, fitted with the paddle attachment, add all the dry ingredients: flours mixture, xanthan gum, yeasts, sugar, vanilla sugar, salt and lemon or orange zest, and mix them together.
- Into the mixer bowl add the psyllium gel, butter and optional liquor, and start mixing on the lowest speed for 5 minutes. Stop the mixer every minute to scrape the sides and bottom of the bowl with a rubber spatula or a flexible plastic bench scraper, in order to encourage uniform mixing. The dough should be smooth with some stickiness to it.
- Transfer the dough to a separate bowl, cover with plastic wrap, and let it rest in the refrigerator for 40 minutes. During this time, the butter and psyllium will set the dough so it can be shaped easily.
Shaping and Frying:
- Dust the counter with some gluten free flour blend (any storebought blend you have at home will be fine, and I recommend using a little sieve to help dusting the flour evenly). Place the dough on the floured counter and dust the top of the dough with some flour as well.
- Divide the dough into 18 pieces, each should weigh 90g.
- Shape each piece into a smooth and round ball. You may use a plastic bench scraper to help achieve a smooth dough surface area. The dough ball should measure 5.5 cm in diameter and 3.5cm tall. I recommend measuring the side for the first donuts, then eyeball the size of the rest.
- Arrange the dough balls on a large baking tray lined with parchment paper, sufficiently spacing them apart. Note that in my video I place each dough ball on a little squared parchment paper. This is not really needed, because the dough can easily be picked by hand.
- Spray the dough balls with water spray bottle, cover with a large piece of plastic wrap, and let it proof for 1 hour.
- After 1 hour, the dough balls with double in size – the diameter should measure 7cm, and they should be 4cm tall.
- A few minutes before the proving time ends, pre-heat the oil in the pot (it should reach about 2/3rds of the pot’s height) and bring it to a temperature that’s between 160-165C.
- Put the donuts, one by one, into the hot oil, with the top part going in first. I recommend frying 3 donuts at a time, so that the temperature won’t spike down too quickly.
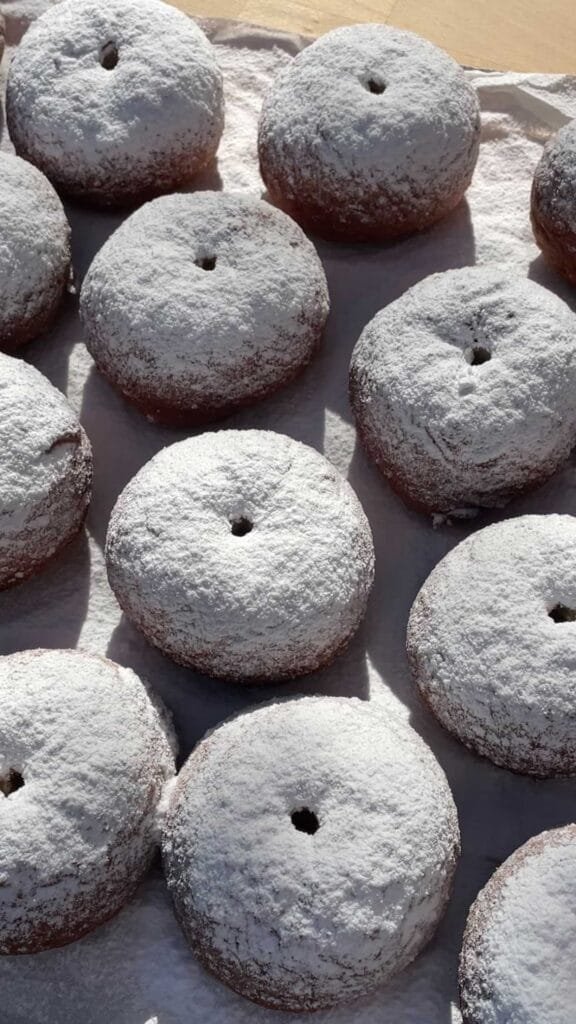
- Fry for 2.5 minutes from each side, on low to medium heat, until deep golden brown, and transfer directly on top of a cooling rack. It’s best to place the cooling rack on top of a flat tray lined with some paper towel, to absorb any excess oil.
Note: During the drying process, the temperature will drop down each time donuts are put into the pan. Also, as the donuts are being fried, the temperature may also increase above the recommended range. I’ve found myself, adjusting the heat levels up and down as I go, hence, it’s very important to use a thermometer to make sure the temperature is accurate. In any case, even if you are slightly above or below the optimal temperature range, do not stop cooking the donuts, as the cooking time is relatively short. - Allow the donuts to cool down just until worm, before filling them with jam or any other fillings of your choice. In the video I show how I first punch holes at the center of each donut, using a place 1cm piping tip, then dust them with powdered sugar, and lastly fill them with jam. This way you can achieve pleasantly aesthetic jelly donuts.
Storage:
The donuts are at their best the day they are made, during the first hours while they’re still warm (as with their gluten filled counterparts), and keep well for up to 2 days stored inside an airtight container. They can be re-heated in the microwave for 20-30 seconds to restore the soft texture.