Gluten Free Cream Puffs
Gluten free cream puffs recipe, that are made with rice flour only, without having to purchase any store-bought flour blend. The more I am experimenting with rice flour, the more I discover its potential in gluten free baking.
I’ve listed down all tips and tricks I know in order to get the best cream puffs, that do not collapse, and if you closely follow all of the instructions below, you will get them perfectly.
The cream puffs are covered with a thin butter cookie layer, called “craquelin”. This cookie covers the cream puff and limit its expansion to a cute ball-like shape, instead of letting it randomly explode in random directions. You can skip the craquelin, and the cream puffs will turn out great without it as well.
I’ve tried all different kinds of sizes, until I hit the perfect size, so you’re welcome to try and be accurate to get the best results.
Remember that cream puffs are at their best 3 hours after the are done being made, while they are still crisp. Still can’t believe these are gluten free, and I hope you enjoy them!
First published:
Last modified:
Gluten Free Cream Puffs
Equipment: No special equipment is required
Recipe: 20 to 24 Cream Puffs
For the cookie dough, craquelin:
| Ingredient | Amount (g / units) |
| Softened Unsalted Butter | 60g |
| White Granulated Sugar | 40g |
| Vanilla Sugar (Can be replaced with additional regular sugar) | 10g |
| White Rice Flour | 50g |
For the choux pastry dough:
| Ingredient | Amount (g / units) |
| Unsalted Butter | 48g |
| Milk | 60g |
| Water | 60g |
| White Granulated Sugar | 5g (1 tsp) |
| Salt | 1/8 tsp |
| White Rice Flour | 75g |
| Eggs | 100g (2 Medium sized eggs) |
For the filling:
| Ingredient | Amount (g / units) |
| Heavy Cream (38%) | 240g |
| White Granulated Sugar | 24g |
Preparation and baking instructions:
For the cookie dough, craquelin:
- In a medium bowl, thoroughly mix the softened butter with the sugar until combined.
- Add in the rice flour, and using cutting-like motions, mix it into the batter until you get a pasty and smooth dough.
- Transfer the dough onto a large piece of parchment paper, and cover it with a large piece of plastic wrap.
- Roll the dough to a 3 mm thickness. You may use thin wooden dowels or a wooden skewer to reach the desired thickness (see video demonstration).
- Transfer the dough with the parchment paper, onto a large tray, and refrigerate for about 15 minutes, then cut out small discs, sized 3.5 – 4 cm. The discs should not be pulled out at this stage. The tray needs to return to the freezer for a few minutes, so the dough can firmly set and the discs can be easily taken out with them being mushed or broken. In any case, keep the discs refrigerated until assembly.
For the choux pastry dough:
- Into a small saucepan, add the butter, milk, water salt and sugar.
- Over medium-high heat, melt the butter and mix all of the ingredients together until the mixture reaches a boiling point.
- Once the mixture is boiling, take the saucepan off the heat, and add all of the amount of rice flour at once. Mix it well with a wooden spoon, until a dough is formed.
- Return the saucepan back to the stove-top, and cook over low heat for 30 seconds only, until a thin film starts to form at the bottom of the saucepan. Take care not to overcook the dough, as it will impact the cream puffs rising in the oven.
- Transfer the dough into a large separate bowl, and cool it down completely at room temperature. You may flatten the dough on the sides of the bowl to quicken the cooling down process.
- After the choux pastry is fully cooled down, add the eggs, one at a time, and using an electric hand mixer, beat the eggs into the dough over low to medium speed. Ensure to clean the sides of the bowl using a rubber spatula, to help mix the batter uniformly. When you pick up the mixture with the spatula, a V-shape should be forming at the edge, and it should be quite stable. That’s our sign that the dough is ready.
- Preheat your oven to 200C (fan mode off), placing a baking rack at the middle shelf inside the oven.
- Transfer the choux pastry dough into a large and thick piping bag, fitted with a plain, round 12mm nozzle.
- Line a baking tray with parchment paper, and start piping the cream puffs. I’ve found that 4cm in diameter and 3cm in height make for the perfect size. You can measure the first cream puff, then eyeball the rest of them.
- Place one craquelin disc on top of each cream puff. Note that if you’ve opted not to make the craquelin, wet your index finger with some water, and gently flatten the tip of each cream puff. This will ensure they are not burnt during baking.
- Starting this stage forward, please carefully follow the baking instructions:
- Bake in the pre-heated oven for 10 minutes.
- Lower the temperature to 175C, and bake for 12-15 minutes, or until the cream puffs have goldened browned.
- Turn off the oven, and take the baking tray onto a cooling rack. Using a wooden skewer, make 1-2 small holes at the top or side of each cream puff to allow the steam to escape. If this step is not done, the steam will wet the cream puffs from the inside and they will collapse.
- Retuned the baking tray back into the turned off oven, and prop the door oven slightly with a wooden spoon covered with some aluminum foil. Leave the tray like this for 10 minutes.
- Close the oven door, and turn on the oven to 90C, to dry the cream puffs for additional 45 minutes. They will not brown and nothing is going to happen to them. This step is required in order to thoroughly dry the cream puffs from the inside.
- Take out the try onto a cooling rack and allow the cream puffs to cool down completely before filling them (its recommended to transfer each cream puff directly onto the cooling rack).
Assembly and filling:
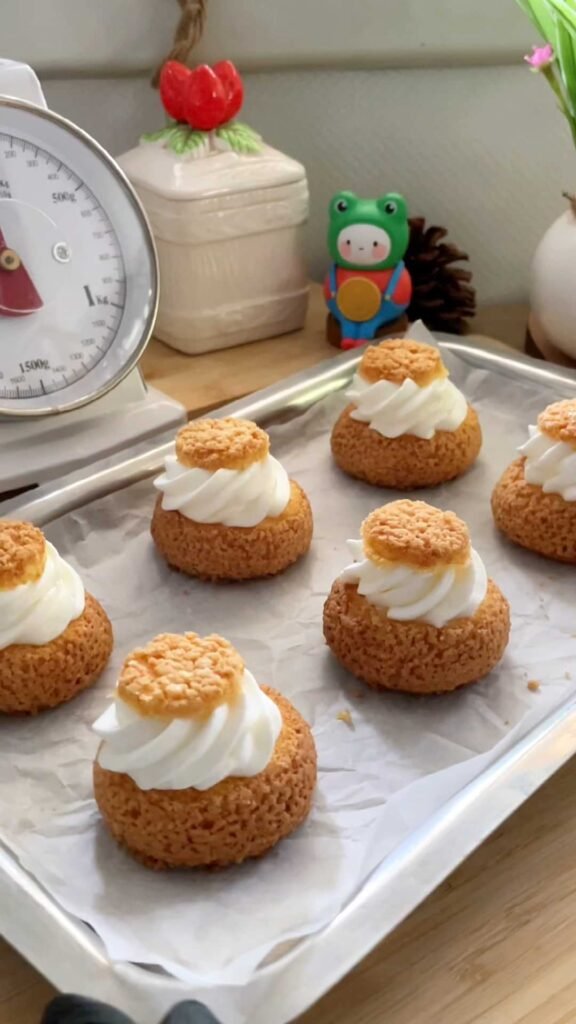
- Beat the cream and sugar to a pipeable consistency, and transfer to a piping bag fitted with a star piping nozzle, or any piping nozzle of your choice.
- You may cut the top part of the pastry, and pipe as shown in the photos, but you can also make a slit at the bottom of each cream puff, and fill it inside. You can use fruit or any other filling of your choice.
- Store refrigerated in an airtight container, for 4-5 days.